Managing Lead Emails
Last updated: October 31, 2025
Users can add, remove, or update lead email settings directly in Admin. This guide will help you understand how leads work within our system and show you how to make updates that best fit your dealership’s needs.
Before diving into the system, it’s important to understand the two lead delivery formats available: ADF and Plain Text.
ADF Format (Automotive Digital Format)
Best for CRM integrations.
Sends form data in a structured XML format recognized by most CRM systems.
Each form field is labeled and categorized, allowing your CRM to automatically import and organize the information (such as Name, Email, Vehicle Info, etc.).
Use this option if your leads are being tracked, scored, or followed up automatically within a CRM.
Plain Text Format
Best for internal use or employee notifications.
Sends the form data as a simple, human-readable email.
Ideal for forms that don’t need to be stored in a CRM — for example, internal requests, event registrations, or promotional entries that are manually reviewed.
Plain text emails can be sent to individuals or teams for direct visibility.
Lead Routing
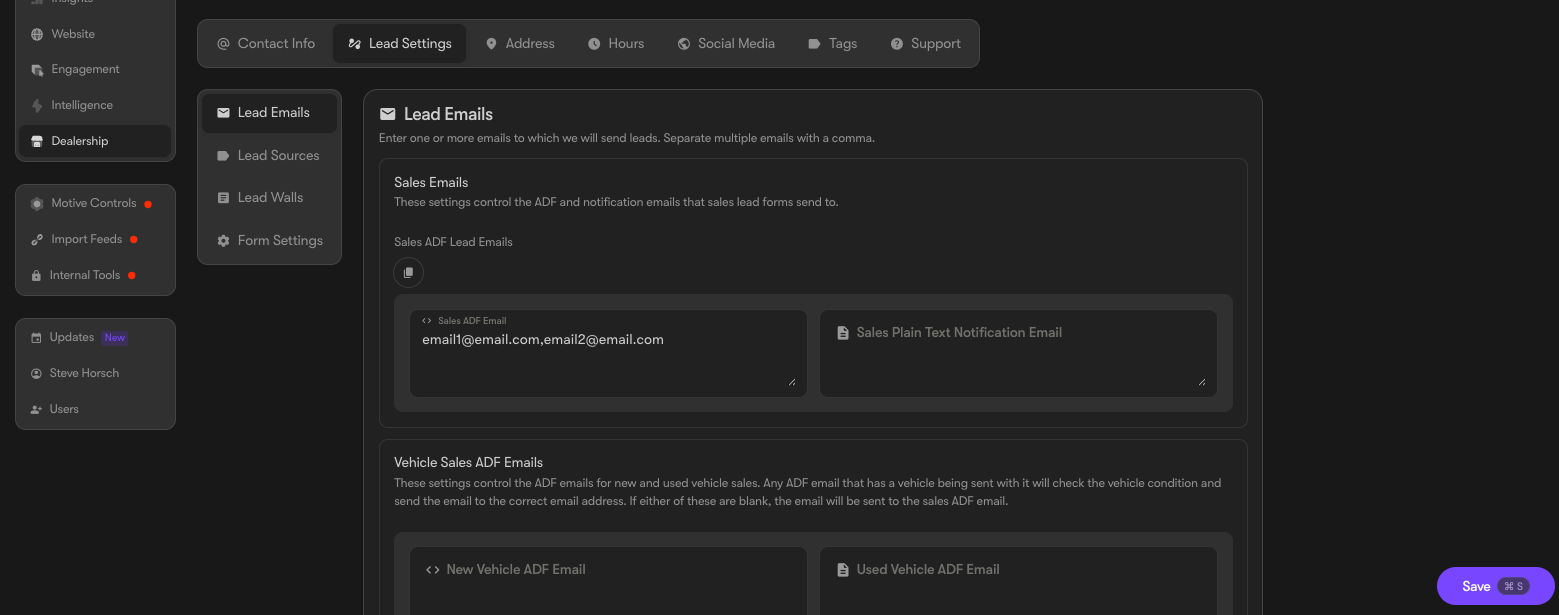
You can find Lead Settings by navigating to Dealership → Lead Settings.
The first section controls lead routing. For each lead type, you can enter one or more email addresses and choose the format (ADF or Plain Text) in which leads should be sent. By default a lead will send to the sales email if no email address is present.
If you need to send leads to multiple email addresses, separate each address with a comma. Click save after making any changes.
Lead Sources
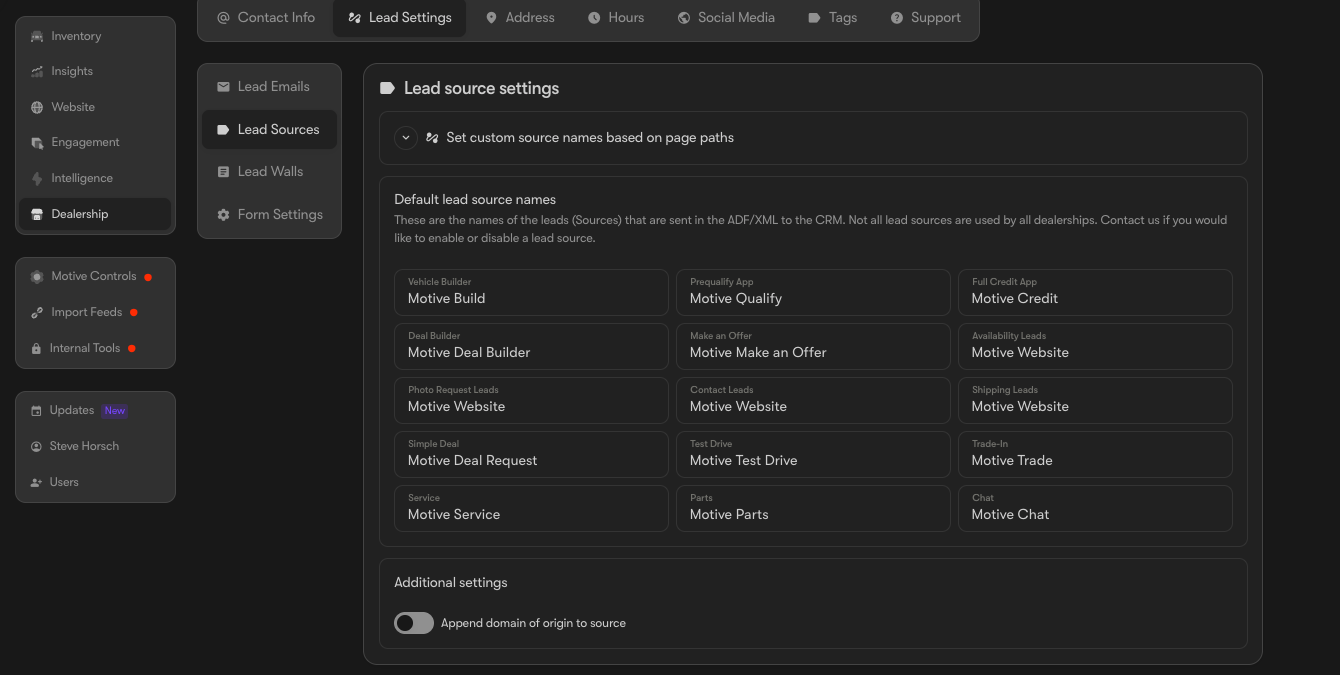
Lead Sources allows you to change the way these lead names send to your CRM. You can also append the domain name in your leads.
Lead Walls
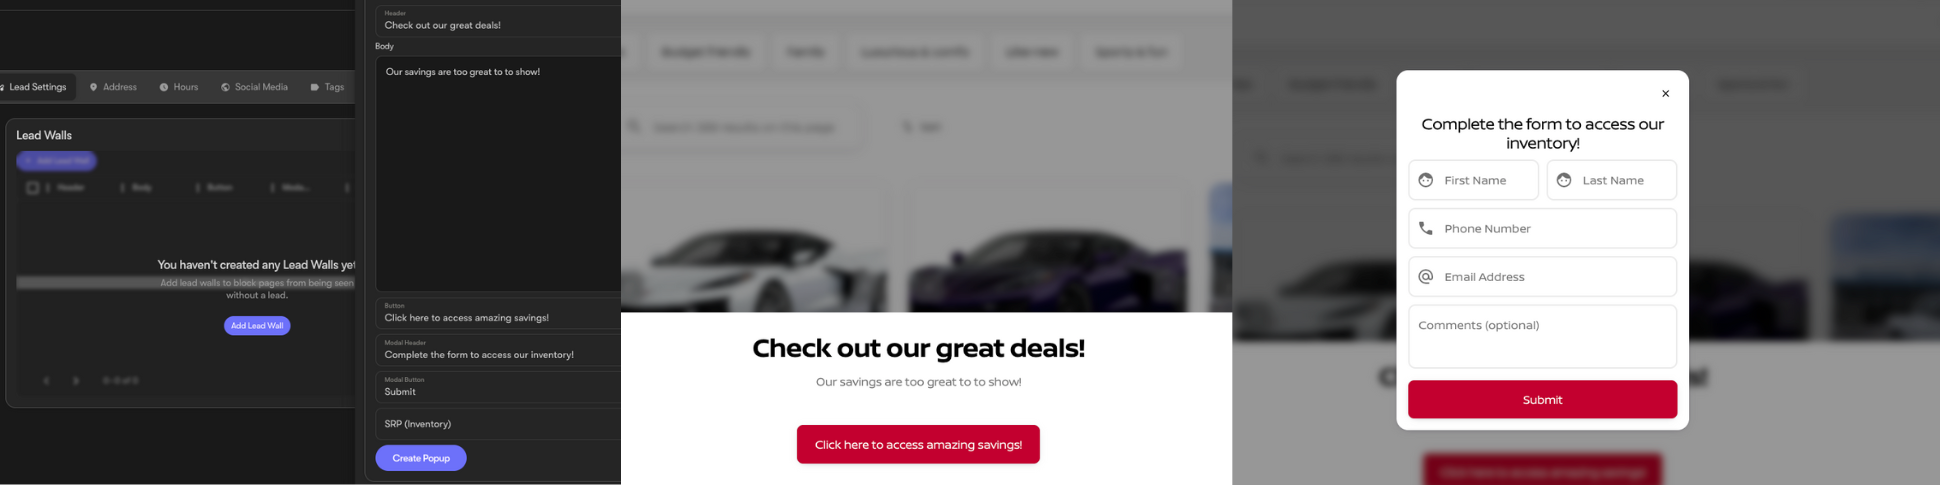
Lead Walls let you require users to complete a customer information form before accessing specific pages or inventory.
1. To create one, click “Add Lead Wall.” Then, enter the Header, Body, and Button text that will appear in the form prompt.
The Modal Header and Modal Button fields control the text displayed on the form itself.
Finally, select the target pages where you want the form to appear.
Form Settings
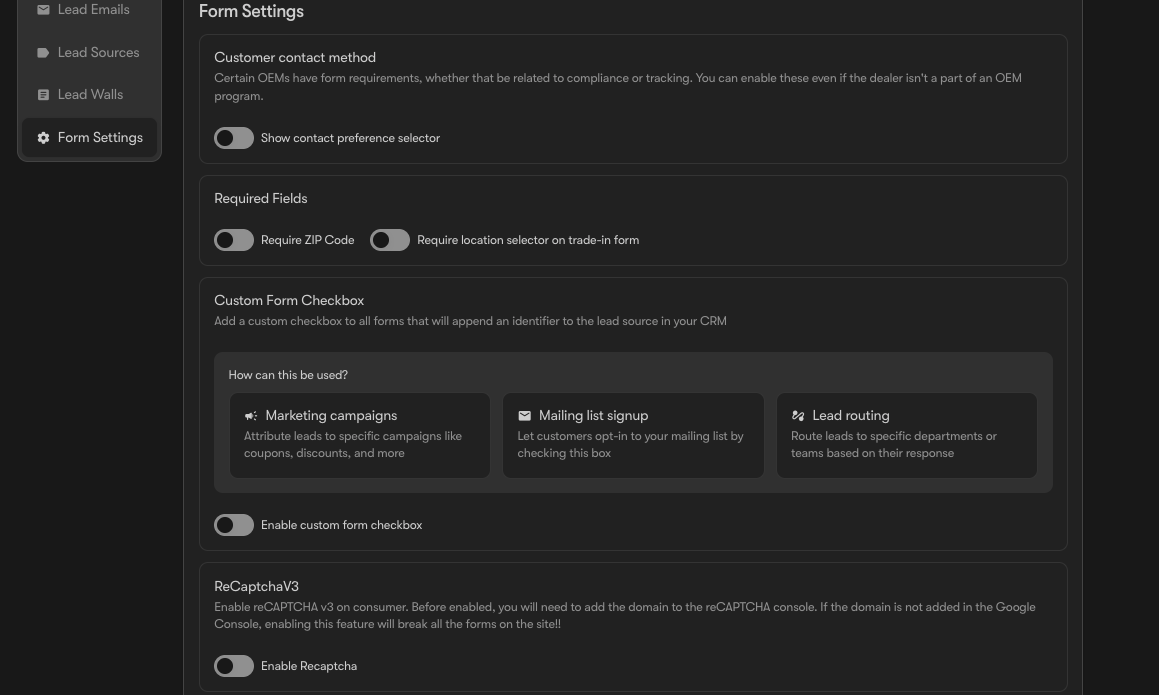
Form Settings let you fine-tune your forms. You can add contact preferences, require additional information, or include a custom checkbox. You can also enable reCAPTCHA v3 to help reduce spam and bot submissions.